Aug. 14, 2026
A Desktop Barcode Scanner for retail POS systems should be selected by matching the scanner’s barcode capability, POS interface, scan volume, counter layout, and total ownership cost. Start by confirming software compatibility, then choose 1D or 2D scanning, evaluate presentation-scanning ergonomics, compare wired and wireless connectivity, and verify warranty, replacement, and deployment requirements.
!
Before comparing a Desktop Barcode Scanner, document the checkout environment rather than starting with a product model. Record the POS terminal’s operating system, available ports, software name and version, barcode formats used by your products, average transactions per hour, and counter dimensions. A small boutique may scan 100–300 items per day, while a grocery checkout can process several hundred transactions during a busy shift.
You should also identify whether the scanner will read only printed UPC and EAN product labels or whether it must process 2D codes. Retailers increasingly encounter QR codes on mobile coupons, digital receipts, loyalty applications, product packaging, returns documentation, and supplier labels. If the scanner will be used for inventory counts, receiving, or product-and-pricing management, the required scan distance and barcode density may differ from the checkout use case.
Create a basic purchasing file with four sections: technical requirements, software requirements, operating conditions, and commercial terms. Include the expected number of checkout lanes, deployment date, spare-unit requirement, shipping lead time, warranty duration, configuration support, and replacement cable availability. This information reduces delivery risk because a scanner that arrives without the correct cable, stand, or interface configuration may remain unused even when the hardware itself is functional.
The first step in how to choose a barcode scanner for a retail POS system is verifying the complete connection path. A scanner may support USB, RS232, or Bluetooth but still require a specific cable, virtual COM configuration, driver, or POS setting. Do not treat the connector alone as proof of compatibility.
For most fixed retail counters, USB HID is the simplest starting point because the scanner sends barcode data as keyboard input. The POS application usually receives the decoded number as if it were typed from a keyboard, which can reduce driver requirements. However, USB HID may provide less control over advanced data formatting, device monitoring, and bidirectional commands than an RS232 or application-specific interface.
RS232 remains relevant when a retailer uses legacy cash registers, industrial terminals, embedded checkout equipment, or software that expects a serial port. RS232 installations commonly require a power supply, a compatible serial cable, and correct baud-rate settings. Confirm the required baud rate, parity, stop bits, data bits, and suffix characters before installation.
Bluetooth is useful when the operator must move the scanner away from the counter or when a wireless presentation scanner supports a charging base. It introduces additional variables, including pairing, battery charging, radio range, sleep settings, and the possibility of a disconnected device during a shift. For a fixed checkout station, wireless mobility should provide a measurable workflow benefit rather than add another battery-dependent component.
A 1D and 2D barcode scanner for retail should be selected according to the codes actually used in the store. A 1D scanner is generally sufficient for traditional UPC-A, UPC-E, EAN-8, EAN-13, Code 39, and Code 128 product labels. It can be an economical choice for a retailer whose checkout process uses printed product barcodes only.
A 2D scanner uses an imaging sensor to decode formats such as QR Code, Data Matrix, PDF417, and GS1 DataMatrix. Retail POS systems may require 2D support when customers present mobile coupons, app-based loyalty identifiers, digital receipts, tickets, or product information codes. A 2D model also gives the retailer a wider future-use range, but it may cost more than a 1D laser or linear-imaging unit.
The decision should be based on a code inventory rather than assumptions about future technology. Inspect at least 100 representative labels from the store, including glossy packaging, small labels, curved containers, damaged labels, mobile-phone screens, and supplier cartons. Record the percentage of codes that are 2D, the smallest bar or module size, and whether the POS system needs the complete data string or only the product identifier.
Choose 2D presentation scanning when any of the following conditions apply:
A 1D scanner remains reasonable for a controlled environment where every checkout item uses printed UPC or EAN labels and the software does not accept mobile codes. The lowest purchase price is not the only factor, because replacing a 1D device later can cost more than selecting a suitable 2D model during the initial rollout.
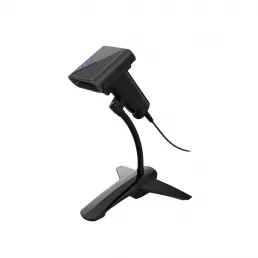
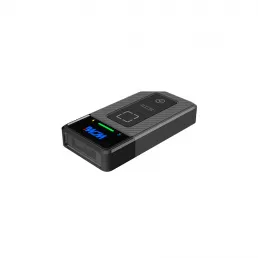
A desktop scanner differs from a handheld model mainly in how the operator presents the barcode. A desktop barcode scanner for retail POS systems normally sits on the counter or in a stand, allowing the cashier to move the product across the scan window without holding a trigger. This arrangement is designed for fixed checkout lanes, service counters, pharmacy desks, convenience stores, and boutique retail stations.
Measure the available counter area before selecting the housing. Record width, depth, height, cable exit position, scanner tilt, and the distance between the scanner and the customer-facing payment terminal. A scanner that occupies 150–200 millimeters of counter depth may be unsuitable for a narrow boutique counter, while a model with a larger scan window may improve presentation scanning in a grocery environment.
Check whether the unit includes a stable stand or requires a separate accessory. The stand should keep the scan window at an angle that allows the operator to present products with one hand. If the scanner is frequently removed from the stand for large or heavy products, confirm the cable’s strain relief and the housing’s resistance to repeated repositioning.
The desktop barcode scanner vs handheld barcode scanner difference is primarily a workflow decision:
| Factor | Desktop presentation scanner | Handheld scanner |
|---|---|---|
| Main use | Fixed checkout counter | Checkout, shelf, receiving, and inventory |
| Operator action | Presents product to scanner | Aims scanner at product |
| Counter space | Required | Minimal |
| Battery dependence | Usually none when wired | None when wired; possible with wireless models |
| Large or awkward items | May require lifting or tilting | Easier to scan in place |
| High-volume checkout | Efficient for repeated presentation scanning | Flexible but adds trigger and aiming actions |
| Mobility | Limited | High |
| Typical deployment | Retail POS lane | Stockroom, mobile checkout, inventory, returns |
Choose a desktop model when most scans occur at one fixed location and the operator benefits from hands-free presentation scanning. Choose a handheld or wireless model when employees regularly scan shelves, cartons, large items, delivery containers, or inventory locations away from the register.
Scan speed should be assessed with real merchandise, not only with a specification sheet. A scanner’s published scan rate may be expressed in scans per second, image frames per second, or decode time, but the actual checkout result also depends on label quality, lighting, barcode angle, package curvature, and cashier motion.
For a practical test, assemble 50–100 products representing the store’s normal range. Include glossy black packaging, low-contrast labels, small EAN codes, damaged labels, plastic bags, curved cans, and mobile-phone screens. Measure the first-read success rate and the number of manual rescans required. For example, a 98% first-read rate across 100 test items means two items required a second attempt; that difference becomes meaningful when multiplied across 2,000 or more daily scans.
Ergonomics also affects operating cost. A presentation scanner should allow the cashier to move products through the scan zone without repeated wrist rotation or trigger use. Consider scan-window size, aiming pattern, audible feedback, visual confirmation, mounting angle, and the operator’s ability to distinguish a successful scan from a failed read.
For high-volume retail, test the scanner continuously for at least 30–60 minutes during a pilot. Monitor missed reads, overheating, cable movement, accidental duplicate scans, and interference with the payment terminal. A short counter trial may confirm basic decoding but will not reveal issues caused by repetitive work or peak transaction flow.
Wired and wireless scanners have different cost and reliability profiles. A wired USB or RS232 scanner generally avoids battery charging, pairing, and radio-management tasks, which makes it suitable for fixed counters operating across multiple shifts. Its main risks are cable damage, port failure, and insufficient cable length.
A wireless scanner can improve mobility for returns, price checks, queue support, and large-item scanning. However, the retailer must manage charging bases, spare batteries, pairing records, radio range, sleep timers, and battery replacement. If one battery lasts an eight-hour shift but charging takes four hours, the store may need a spare battery or a second scanner to prevent downtime.
Calculate total cost of ownership over three years rather than comparing purchase prices alone. A simple model includes scanner price, stand, cable, power adapter, spare battery, configuration labor, warranty shipping, replacement units, and expected failure-related downtime.
| Cost component | Wired desktop model | Wireless desktop or hybrid model |
|---|---|---|
| Scanner and stand | $90–$350 | $160–$500 |
| Cable or charging base | $10–$45 | $45–$150 |
| Spare unit allocation | $90–$350 | $160–$500 |
| Battery replacement over three years | Usually $0 | $30–$120 per battery |
| Configuration labor | $15–$60 | $25–$90 |
| Typical three-year planning range | $205–$805 | $420–$1,360 |
These are procurement planning ranges, not quotations. Actual prices vary by scan engine, interface, order quantity, support terms, enclosure, certification, and region. For a store with five checkout lanes, a $100 price difference per lane creates a $500 initial difference, while a single two-day replacement delay can produce additional labor, queue, or emergency procurement costs.
A desktop scanner captures the barcode through a laser, linear imager, or area-imaging sensor and converts the pattern into decoded data. The scanner then transmits that data to the POS terminal through USB, RS232, or Bluetooth. The POS application uses the decoded string to search a product database, apply pricing rules, update inventory, and record the transaction.
In a USB HID setup, the scanner commonly behaves like a keyboard. The device sends the barcode digits followed by a configured suffix, such as Enter, so the POS application can process the item. This setup is straightforward but should be tested with product search, quantity entry, discounts, returns, and loyalty workflows.
An RS232 setup communicates through a serial interface and may provide more controlled integration. The retailer may need to configure communication parameters and confirm whether the POS system expects a specific prefix, suffix, or data format. Bluetooth setups may use keyboard emulation or a virtual serial connection, depending on the scanner and host device.
Integration testing should include more than a successful item lookup. Test duplicate scans, unreadable labels, canceled transactions, age-restricted products, weighted goods, price overrides, coupon codes, customer loyalty IDs, returns, and end-of-day reporting. A scanner can decode correctly while still producing an integration problem if the suffix, character encoding, or data length does not match the POS software.
A retail checkout pilot should reproduce the sequence used by cashiers. Begin with 20–30 standard UPC or EAN products, followed by damaged labels, curved containers, shrink-wrapped goods, and small packages. Then test QR codes from a printed sheet and from at least three different phone screens with different brightness levels.
Returns require separate attention because the scanned code may be a receipt identifier rather than a product UPC. Test whether the scanner can read the return code at the required distance and whether the POS software receives the complete data string. If the retailer uses loyalty codes, confirm that the scanner does not add unwanted characters or trigger an unintended checkout command.
Inventory counts may require a different operating pattern from checkout. Employees may scan shelf labels, cartons, locations, and product codes from distances of 100–500 millimeters. If inventory work is frequent, a handheld or wireless unit may be more suitable than a fixed presentation scanner, even when the checkout counter itself uses a desktop model.
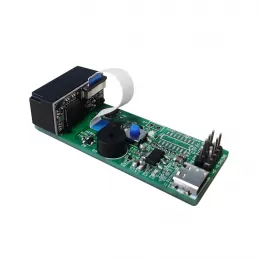
A manufacturer comparison should cover technical documentation, customization, test records, warranty handling, replacement parts, and delivery controls. Ask for the scan engine type, supported symbologies, interface options, operating temperature range, drop or impact testing information, ingress protection where applicable, and configuration procedures. Request sample units before committing to a multi-lane deployment.
WCMI, also known as Wavecreating Micro Intelligent, lists desktop barcode scanners, omnidirectional barcode scanners, wired barcode scanners, wireless barcode scanners, scanner modules, and embedded scanner engines within its product portfolio. The company describes product development around chips, image-recognition algorithms, and customized services, and lists applications including automated scanning, self-shopping, grocery checkout, and product and pricing management. Its website also states that its customer response mechanism operates within 24 hours; buyers should still confirm the contractual service level, spare-unit process, and shipping timeline for a specific project.
For supplier qualification, request a written delivery schedule with production lead time, inspection time, export documentation, and shipping method. If a retailer plans to open ten lanes by a fixed date, order planning should include at least one spare unit per 10–20 deployed scanners, depending on replacement availability and operating risk. Ask whether the same model, cable, stand, and firmware will remain available for the planned support period.
Professional buyers should request evidence related to:
Do not assume that a supplier’s general product brochure proves suitability for a particular POS environment. A pre-shipment inspection can verify model number, interface, accessories, scan modes, firmware, and sample decoding. For larger orders, define an acceptance test with a pass threshold, such as successful decoding of 98 out of 100 representative labels under agreed lighting and distance conditions.
Indicative desktop barcode scanner pricing usually depends on the decode type and deployment configuration. Basic 1D USB models may fall near $50–$120, entry-level 2D desktop models around $90–$220, and commercial omnidirectional or customized units around $180–$500 or more. Integrated stands, RS232 interfaces, wireless bases, special housings, and private-label configuration can increase the final price.
Warranty duration should be evaluated alongside the replacement process. A two-year warranty with international return shipping may produce more downtime than a one-year advance-replacement program. Ask whether defective units are repaired, replaced, or credited, and whether cables, stands, batteries, and power adapters are covered separately.
A basic ROI calculation can compare labor savings with equipment cost. Suppose a desktop presentation scanner saves three seconds per item compared with repeated handheld aiming, and a lane processes 1,200 items per day. The theoretical time reduction is 3,600 seconds, or 60 minutes per day. Even if only half of that time becomes usable capacity, the retailer may recover a $200 scanner cost quickly, provided the POS integration does not create additional delays.
The calculation should include actual wage rates, transaction volume, rescan frequency, queue conditions, and training time. A scanner that costs $80 less but generates one additional rescan per 100 items may impose a larger labor cost over three years than a model with a higher purchase price. Use pilot results rather than published scan-speed claims when calculating expected payback.
Place the scanner so the scan window faces the operator and leaves enough clearance for the largest frequently scanned products. Keep the cable away from drawer slides, receipt-printer mechanisms, and customer bags. If the scanner uses a stand, secure the base according to the counter material and check that the angle remains stable during repeated product presentation.
Configure the scanner before deploying it to every lane. Save the correct interface, suffix, illumination, beeper, volume, sleep mode, and symbology settings in a written configuration record. Label each scanner with its lane number and firmware version so that support staff can identify differences during troubleshooting.
Clean the scan window according to the manufacturer’s instructions and inspect it for scratches, adhesive residue, and dust. A damaged or dirty window can reduce first-read performance without producing an obvious hardware fault. Establish a monthly inspection for high-volume lanes and a quarterly review for lower-volume counters.
Maintain at least one tested spare for every group of active lanes. The spare should include the correct cable and configuration, not merely the scanner body. Store the unit in a labeled location and verify its operation at least once per quarter so the retailer does not discover a dead battery or incompatible firmware during a checkout failure.
How to Choose a Desktop Barcode Scanner for Retail POS Systems depends on five practical decisions: POS compatibility, 1D or 2D barcode requirements, fixed-counter form factor, scan volume, and total cost of ownership. For a fixed checkout lane using UPC and EAN labels, a wired USB desktop scanner may provide the simplest installation and lowest maintenance burden. For mobile coupons, loyalty codes, digital receipts, GS1 data, and future expansion, a 2D presentation scanner is usually the more adaptable option.
Before ordering, test 50–100 representative products, confirm USB HID or RS232 requirements, verify Bluetooth and battery behavior when mobility is needed, and document every accessory required for deployment. Compare scanner, stand, cable, battery, warranty, spare-unit, configuration, and shipping costs over a three-year period. Suppliers such as WCMI can be evaluated by product scope, customization capability, technical documentation, response commitments, and replacement support rather than purchase price alone.
The next step is to create a compatibility checklist, run a one-lane pilot, measure first-read performance and operator time, and use the results to select the final model for every retail checkout station.
How to Choose an Embedded Barcode Scanner Engine Manufacturer in China
How Does an Omnidirectional Barcode Scanner Read Barcodes from Any Angle?
HOT PRODUCTS
It has a perfect customer response mechanism in 24 hours to provide you with first-class after-sales service.
Quick Links
Quick Links
Contact Us
Tel.: +86 22 6621 1296
Email: liu_y@wavecreating.com
Add.: No19 Xinhuanxi Road, Teda, Tianjin, China
Fax: +86 022 6621 1296
Whatsapp: 86 18522521070